CSS
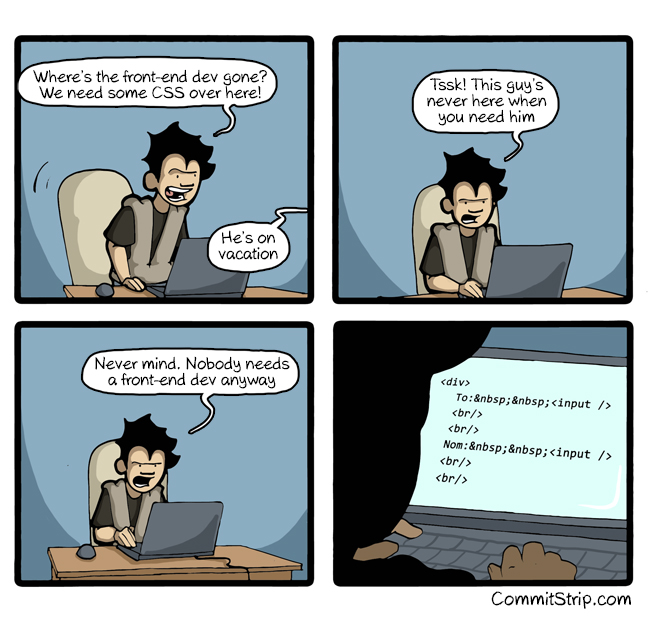
The campus Midnight Market opens tonight, and its webpage needs to help visitors find announcements, a dumpling menu, and the sold-out item. The HTML contains the information. Give the announcements and sold-out notice enough emphasis that visitors can find them quickly. CSS, short for Cascading Style Sheets, lets us change fonts, colors, and spacing and arrange content on the page. The unstyled page in the comic has the same problem:
Market HTML
Create a practice index.html using the previous reading’s document skeleton. The page needs announcements for the whole event and a food stall with its own description, menu, and closing-time notice. Open index.html in the browser and keep it open beside the editor. Create an empty style.css in the same folder. We will add its link and rules below. Save and reload these same files after each change.
Here is the content inside <body>. <main> holds the page’s main content, and <section> groups the information about one stall:
<main id="night-market">
    <h1>Midnight Market</h1>
    <p class="notice">Bring a mug. The chai is on us.</p>
    <section class="stall">
        <h2>Moonrise Dumplings</h2>
        <p>Hand-folded dumplings, chili crisp optional.</p>
        <ul>
            <li>Sweet potato <span class="notice">sold out</span></li>
            <li>Mushroom and ginger</li>
        </ul>
        <p class="notice">Last batch at 10:30.</p>
    </section>
    <p>Next market: Friday after finals.</p>
</main>
Stylesheet Rules
A CSS rule has two parts: a selector that chooses which elements the rule applies to, and a declaration block in curly braces that says what to do to them. One simple rule turns the text of every paragraph teal:
p {
    color: teal;
}
p is the selector, and it chooses every <p> element on the page. Inside the braces, color: teal; is one declaration, setting the color property to the value teal. Every declaration is a property: value; pair, and a block can contain several declarations, each ended by a semicolon.
CSS can be written inline on a single element, in a <style> block in the page’s <head>, or in a separate file shared by every page. Use a separate file so pages can share styles. Put your rules in style.css and link it from the <head> of each HTML page:
<head>
    <title>My First Page</title>
    <link rel="stylesheet" href="style.css">
</head>
The <link> element pulls style.css into the page, so one edit to that file restyles every page that links it. Replace My First Page with Midnight Market in your market page’s <title>. Your first project will require exactly this setup.
Keep style.css beside index.html for this example, because href="style.css" names a file in the same folder. Save both files, then reload the HTML page to see a stylesheet change. If nothing changes, check that the stylesheet loaded and that its selector matches an element on this page.
Classes and IDs
The market has two notice paragraphs and a sold-out notice inside a list item. We want to emphasize all three, regardless of their HTML tag. For the small selector experiments, create selector-experiments.html with the HTML skeleton and the same stylesheet link. Put the paragraph, span, and heading examples below in that file. Keep the market’s index.html unchanged while checking how the new selectors work.
A type selector, such as p or h1, selects every element of that type. The class and id attributes let you select a smaller set of elements.
A class is a reusable label you can put on any number of elements. You add it in the HTML with the class attribute, and you select it in CSS with a dot:
<p class="bold">This paragraph is bold.</p>
<span class="bold">So is this span.</span>
Select that class in CSS:
.bold {
    font-weight: bold;
}
The .bold selector matches every element whose class is bold, regardless of its tag, so the paragraph and the span both go bold. Use classes whenever a style applies to a group of elements.
The class name itself has no built-in appearance: class="bold" does nothing until a rule supplies the style. An element can have several classes separated by spaces, such as class="bold warning". .bold and .warning both match it. The dot belongs in the CSS selector, not in the HTML attribute value.
An id names one element and must be unique on the page. You add it with the id attribute and select it with a hash:
<h1 id="top">Welcome</h1>Select that id in CSS:
#top {
    color: teal;
}
The #top selector matches the single element with that id. A class marks a category (“all the warnings”), while an id names one element (“the site header”).
Apply the class idea to the market’s existing notice labels and the id idea to its night-market container:
.notice {
    font-weight: bold;
}
#night-market {
    font-family: sans-serif;
}
The two notice paragraphs and sold-out span become bold. The container’s font choice passes down to its contents through inheritance. Leave the .bold and #top experiments out of the market HTML so its element counts stay the same.
Combinators and the Document Tree
Our first p rule colors every paragraph teal, including the stall description and closing-time notice. The event announcements should be teal, but the stall introduction should be italic. Their positions in the document let us distinguish them without adding a class to every element.
The browser represents the document as a Document Object Model (DOM), which includes a tree of its elements. The diagram shows the elements inside <main>, with short descriptions of their content. Text nodes are omitted:
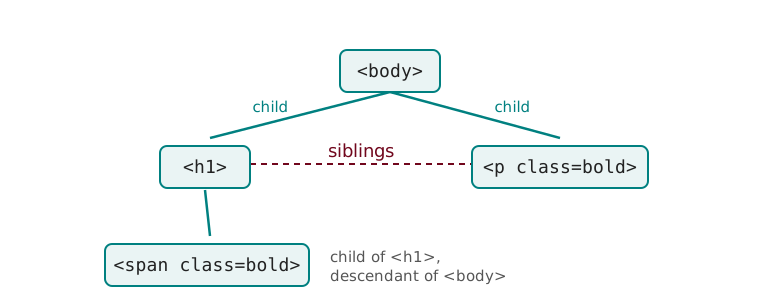
<main> is the parent of four elements: the <h1>, the mug reminder, the stall <section>, and the next-market paragraph. Those four children are siblings because they share a parent. The stall’s <h2> and paragraphs have a different parent, <section>, so they are not siblings of the page’s <h1>.
An element’s descendants include its children, their children, and every deeper level. The sold-out <span> is a child of the first <li> and a descendant of <ul>, <section>, and <main>. Each branch in the diagram connects a parent to a direct child. Siblings appear from left to right in their HTML order.
A combinator joins selectors by specifying one of these relationships:
| Selector | Relationship | Matches in the market page |
|---|---|---|
main p |
Descendant: inside main at any depth |
All 4 paragraphs |
main > p |
Child: directly inside main |
2: the mug reminder and next-market announcement |
h2 + p |
Adjacent sibling: the next element after h2, with the same parent |
1: the dumpling description |
h2 ~ p |
General sibling: any later p with the same parent as h2 |
2: the description and last-batch notice |
The space in main p can cross several levels of nesting. > crosses exactly one. For the sibling selectors, the intervening <ul> keeps the last-batch notice from matching h2 + p, but it still matches h2 ~ p. The next-market announcement matches neither sibling selector because it belongs to <main>, outside the heading’s <section>. Blank lines and indentation between tags do not interrupt element adjacency.
Replace the first p { color: teal; } experiment with the following rules. Removing the broad color rule leaves the stall paragraphs in their default color. These rules color the event announcements and italicize the stall introduction:
main > p {
    color: teal;
}
h2 + p {
    font-style: italic;
}
Read a combined selector by first finding candidates for its rightmost part, then checking their relatives. For h2 ~ p, look at each <p> and ask whether an earlier sibling is an <h2>. The match is the paragraph. The heading supplies the condition and does not receive the rule’s declarations.
You can group selectors with a comma to give several the same rule: h1, h2, p { color: teal; } styles all three, and you can select by any attribute in square brackets, like [src="cat.jpg"] for the image with that source. In the market page, p.notice matches the two paragraphs labeled notice: the mug reminder and last-batch notice. p .notice, with a space, matches nothing: none of the paragraphs contains an element labeled notice. The sold-out span is inside a list item. p, .notice, with a comma, matches all four paragraphs plus the sold-out span, for five elements total. An element that matches both grouped selectors is counted only once.
Checking Selector Matches
A selector can be valid CSS and still target the wrong announcement. Check its matches against the market HTML before relying on its appearance. Save the market page and open it in a browser. Open that page’s developer tools with F12 and go to the Console. document.querySelectorAll returns the matching elements, and .length counts them. These expressions give the following results on our example:
document.querySelectorAll('main p').length     // 4
document.querySelectorAll('main > p').length   // 2
document.querySelectorAll('h2 + p').length     // 1
document.querySelectorAll('h2 ~ p').length     // 2
Omit .length to inspect which elements matched. Try predicting ul .notice, ul > .notice, and li > .notice before running them. Use the tree to check why each element matches or fails to match.
The Cascade
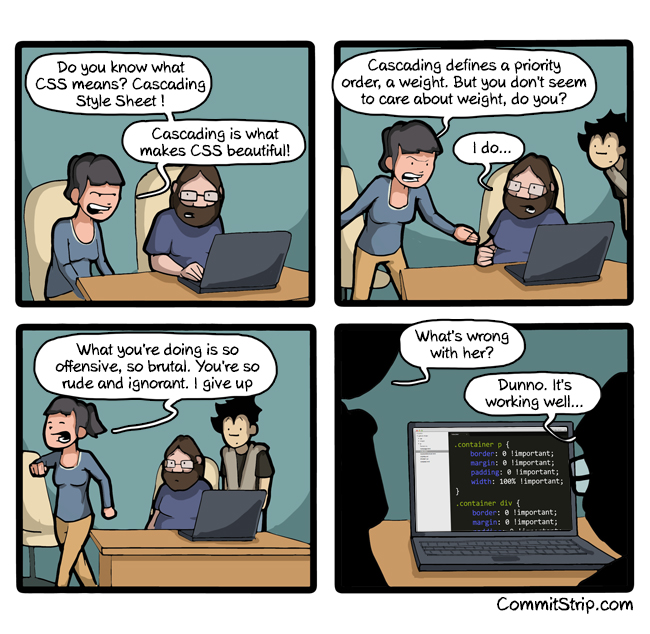
Suppose another organizer adds p { color: black; } to restore the paragraphs’ default color. The mug reminder now matches both that rule and our main > p rule, so we need to know which choice the visitor will see. When two rules set the same property on the same element, the cascade determines which one applies. This priority order is the “cascading” in Cascading Style Sheets.
For the ordinary rules in our single stylesheet, the cascade resolves conflicts by specificity: a more specific selector takes precedence over a less specific one. An id selector takes precedence over a class selector, and a class selector takes precedence over a type selector, because naming one element is more specific than naming a category, which is more specific than naming every tag. When two selectors tie on specificity, the one written later in the file takes precedence. Recall the small .bold experiment from before we styled the notices. For <p class="bold">, both p { color: black; } and .bold { color: teal; } match. The class rule makes its text teal even if the type rule appears later.
Conflicts are resolved one property at a time. The earlier .bold rule still supplies font-weight: bold because neither color declaration replaces it. Back on the market page, main > p has two type selectors, making it more specific than p alone. The two event announcements stay teal even if the new black-paragraph rule appears later. The .notice rule still makes the notices bold, because it sets a different property. An element can therefore get its final appearance from several rules. Some properties, including text color, can also be inherited from a parent when the element has no declaration of its own.
The !important annotation gives a declaration priority over ordinary declarations, but competing important declarations still need to be resolved. Prefer to fix the matching rules. MDN’s cascade guide covers the additional rules for inline styles, layers, and other sources of styles.
Spacing and Responsive Design
Add space between the announcements to make them easier to read. CSS draws each element in a box: its content is surrounded by padding, then a border, then margin separating it from nearby boxes. For a paragraph, this rule adds space inside and outside its border:
p {
    padding: 12px;
    border: 1px solid teal;
    margin: 20px;
}
The text sits 12 pixels inside the border, and the margin provides space outside it. Change the padding and margin separately to see which gap moves. An element’s background extends through its padding but not into its margin.
Visitors also need a link to the next event. After finishing the selector-count experiments, make the final announcement into a link:
<p>Next market: <a href="next-market.html">Friday after finals</a>.</p>For this practice page, create next-market.html with the HTML skeleton and a short announcement so the link has a destination. This adds an <a> while leaving the four existing paragraphs in place. Set text and background colors with color and background-color, and react to the mouse with the :hover pseudo-class, which selects an element only while the pointer is over it:
a {
    color: teal;
}
a:hover {
    background-color: #f2d6d9;
}
Links are teal and get a pale red background while the pointer is over them. The link remains the same HTML element. Moving the pointer changes whether the second selector matches. A phone also needs to use its actual screen width when laying out the page. Add this metadata inside <head>:
<meta name="viewport" content="width=device-width, initial-scale=1">A @media rule makes a page adapt to phones by applying nested rules only when a condition holds, such as a narrow screen:
@media (max-width: 600px) {
    body {
        font-size: 14px;
    }
}
In a browser window 600 CSS pixels wide or narrower, the body text becomes 14 pixels. On anything wider, this block does nothing. Resize the window to test both cases without changing the HTML. This is a basic example of responsive design, and your project rubric asks for one such rule. Look up other properties in the CSS cheatsheet or Shay Howe’s Getting to Know CSS.
Check the page: the event announcements should be teal, the three notices bold, and the dumpling introduction italic. Hover over the event link, follow it, and resize the window across the 600-pixel boundary. Those same selection skills will let our Python scraper collect information from a page later in the course.